
Lesson 2 – Addressing the Oche (throw line)
There is no required foot position in USADA play.
What matters most is consistency and repeatability.
Some stances may feel more natural, while others may reduce effort or movement
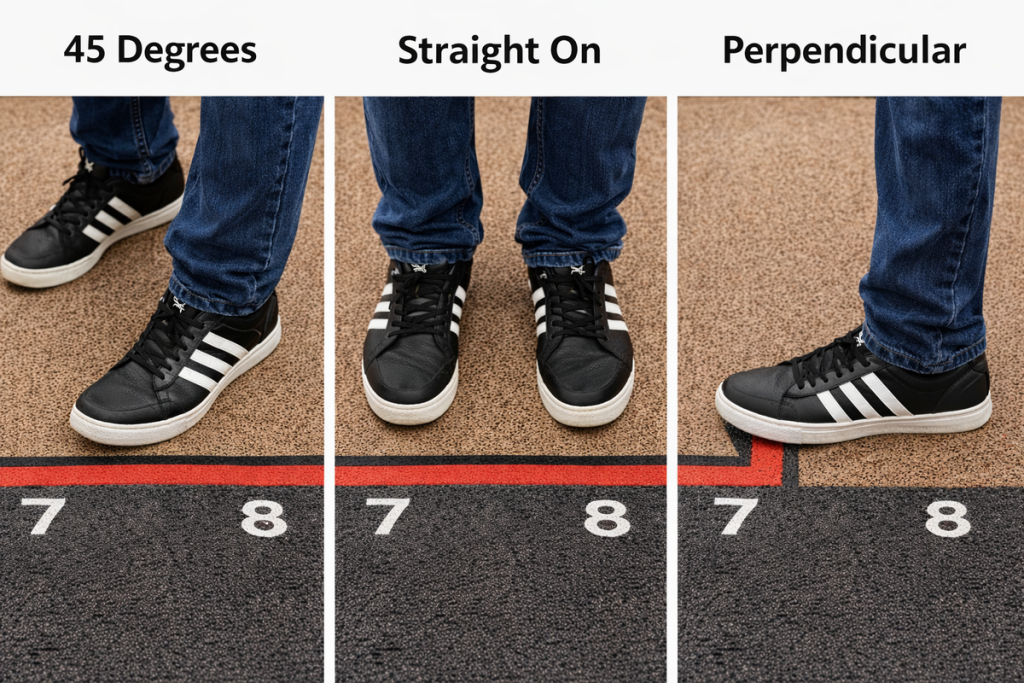
Foot Position at the Oche — What Each One Actually Does
1. Perpendicular to the oche
(Side of the foot parallel to the line)
What it causes
Shoulder, hip, and throwing arm line up more naturally
Upper body stays quieter
Arm can swing freely without torso rotation
Arm can swing freely without torso rotation
Slightly shorter effective distance to the board (not huge, but real)
What it allows
Smoother arm path
Less wasted motion
Easier repeatability
Lower effort to generate the same dart speed
Why it works
You’re reducing variables. The body becomes a stable platform and the arm does the work
A perpendicular stance often feels more efficient for many players because it reduces body movement and frees the throwing arm
2. Straight on (both feet facing the board)
What it causes
Squared hips and shoulders
More tension in the torso
Limited shoulder clearance on the throwing side
What it often requires
Slight torso movement or shoulder compensation
More conscious effort to keep the arm straight
Effect
Can feel stable
Often needs more force to achieve the same dart speed
Consistency can suffer under pressure
⚠️ Not “wrong,” but harder to repeat long-term for most players.
3. 45-degree stance
What it causes
Partial opening of the shoulders
Mixed arm + body involvement
Inconsistent release angle if timing slips
What it often leads to
More reliance on timing
Greater variance under fatigue
Subtle rotation creeping into the throw
Effect
Can feel natural at first
Requires more effort and control
Less forgiving if rhythm breaks
⚠️ This stance is the most “feel-based” and least stable over time.
Practice Guidance: Testing Your Stance
During practice sessions, begin with your current stance for warm-up over the next three days.
After warming up, switch to one of the other two stances and commit to it for the remainder of each session.
Practice by:
Throwing at the bullseye
Throwing at your favorite scoring numbers
Tracking results, not feelings
Avoid prejudging results.
Change takes time, and improvement often appears after discomfort.
During those three days, you may feel tempted to return to your original stance — resist that urge and allow the process to work.
After the three-day period:
Alternate practice sessions between your original stance and the newly tested stance
Stay aware of consistency, effort and repeatability
If you play in weekly league or tournament matches, begin competition
using the stance that produced the best practice results.
You may adjust during competition if needed — awareness is part of learning.
In your next practice cycle, repeat the same three-day process using the remaining third stance, tracking results the same way.
The goal is not to find the “perfect” stance — it’s to discover the stance you can repeat with confidence.
Trust the process, stay patient, and let consistency guide your progress.